

You will need:
Fabric 120 cm wide
EU 32-36/UK 4-8/US 0-4 1.6 m
EU 38-42/UK 10-14/US 6-10 1.75 m
EU 44-54/UK 16-26/US 12-22 2.1 m
Fabric 140 cm wide
EU 32-36/UK 4-8/US 0-4 1.5 m
EU 38-42/UK 10-14/US 6-10 1.6 m
EU 44-54/UK 16-26/US 12-22 2 m
Interfacing 80 cm
Pocket lining 35 cm
Buttons 11 pieces (approx. 2 cm in diameter)
Thread
No. 30 verona - Version 1
A-line skirt with pockets, front placker with buttons and belt loops.
Fabric choice:
Light to medium-weight woven fabric: cotton, silk, wool, viscose, cupro, linen or polyester. Not suitable for jersey fabrics.
Find Your Size:
Take your measurements according to the measurement chart. Choose the size closest to your measurement. Print the measurements chart here.

Fitting:
We recommend that you always make a muslin before you cut the fashion fabric, to make sure your finished style will fit you perfectly.
Cutting Fabric
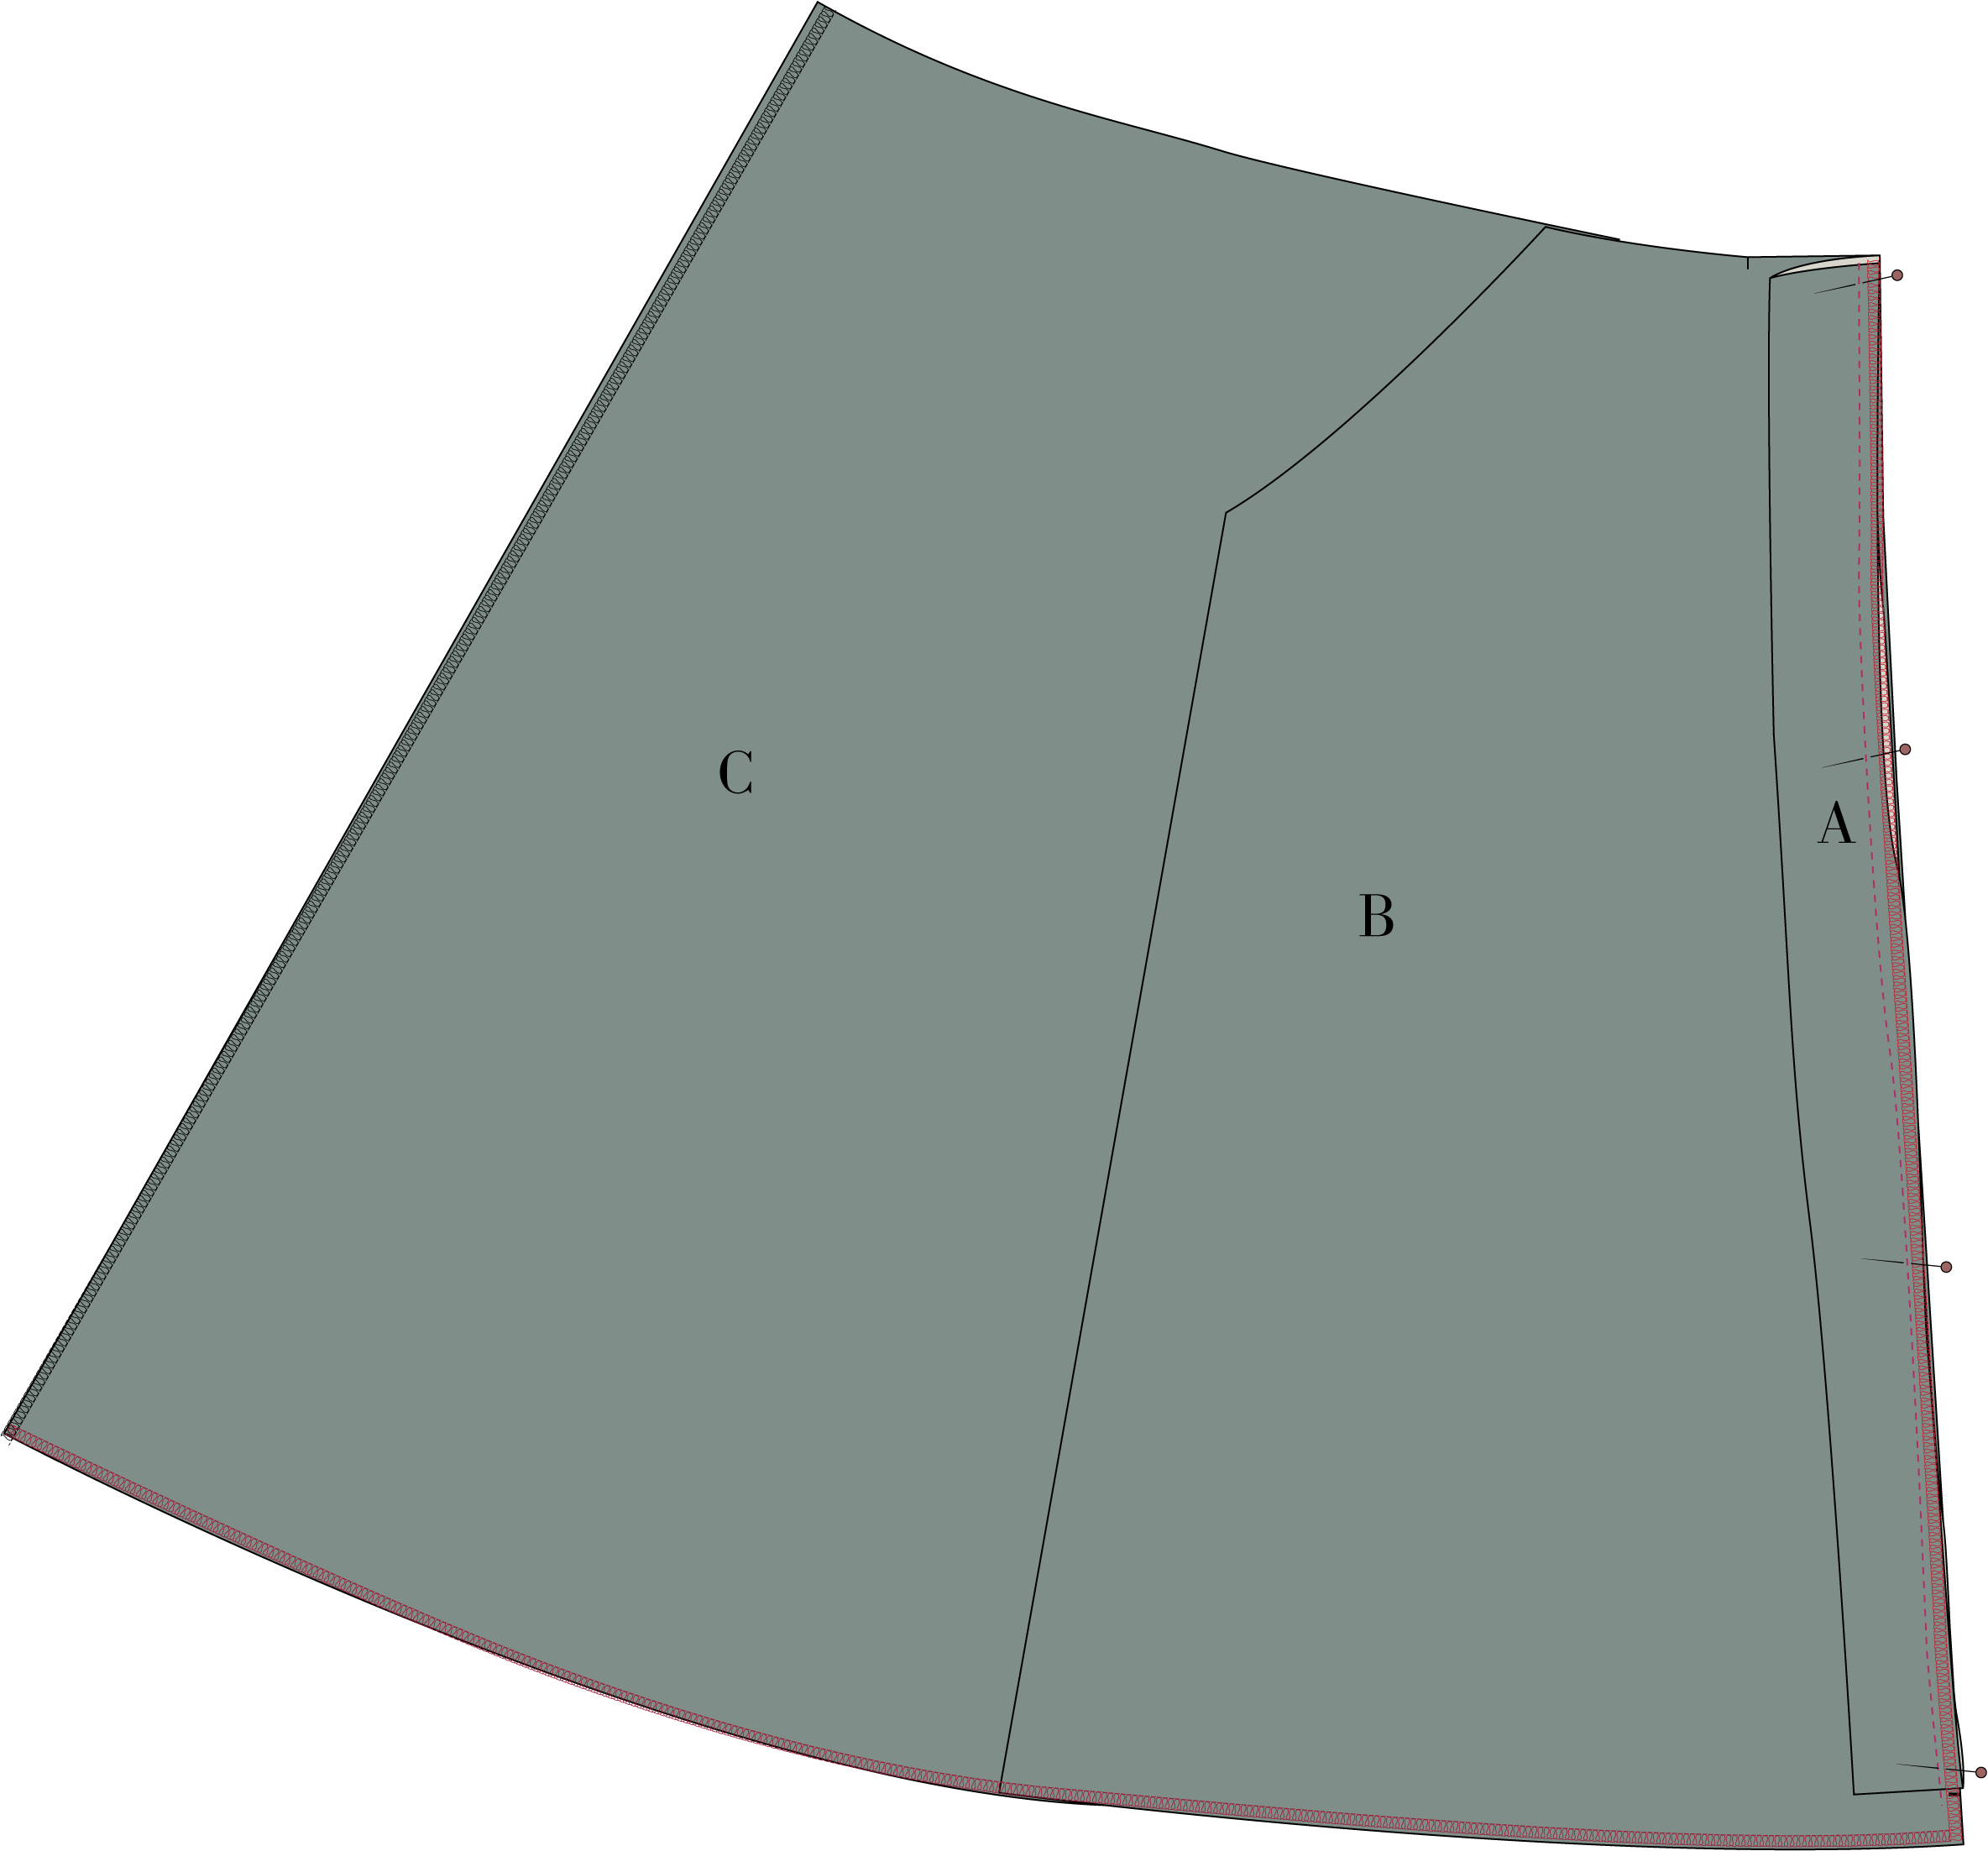
On each pattern piece, you will find a capital letter. On the cutting layout plan, you will find the same capital letters so that you can easily see which pattern pieces to use for the view you have chosen.

YOU WILL NEED THE FOLLOWING PATTERN PIECES:
A, B, C, D, E, F, G


Sewing
NOTE! The Pattern Has 1 Cm Seam Allowances Included Unless Otherwise Noted.
Cut all your pieces in fabric and interfacing as needed. !NOTE! Make all notches and markings from your pattern.
Press the interfacing to the placket (A), Waistband front and back (D & E) and a piece of stay tape in the pocket opening on the front (B)

SEW THE POCKET
3. Place a pocket bag (F) to the front (B), right sides together and matching the side with a notch at the end of the slanted edge with the pocket opening on the front pattern piece.
4. Press the pocket bag and all the seam allowance away from the front piece and under stitch the pocket bag.

5. Place The build-in pocket facing on the backpiece (C), to the pocket bag (B), right sides together and sew the the two pieces together.
6. Finish the seam allowance all layers together and press the seam towards the pocket bag.

7. Place front – and back side together in the side seam (B) (C) with right sides together and pin from the bottom to the marking on the backside. The marking ends in the pocket fold on the front 1 cm from the bottom of the pocket.
8. Sew the side seam; With the back facing you, so you can see exactly where to stop the seam. Remember to backstitch.
9. Assemble the pocket bag (F); Fold the pocket bag at the two notches, right sides together, and pin the pocket bag together at the bottom to the side seam. Place the last pin at the end of the side seam. At the corner between the pocket bag and the front there will be a small fold in the seam allowance. This is only because of the different angels on the front and backpiece. It is important that the fold is only in the seam allowance.

10. Sew the pocket bag (F) together at the bottom and stop the seam at the side seam.

11. Finish the side seam and the pocket bag in one long seam by overlocking or sewing a zig-zag.
12. Finish the center back seams by overlocking or sewing a zig-zag.
13. Press the side seam and pocket bag towards the front, at the same time press the pocket bag nicely, the pocket bag should be aligned to the notch at the waist. You can clip a small notch at the triangle to make it lay flatter.

SEW THE FRONT PLACKET
14. Fold the front placket (A) right sides together along the long edge. Sew the short end farthest away from the notch together, right sides together.
15. Turn and press the front placket.
16. Place the front placket (A) with right sides together with the front center edge (B), matching the notches. The turned end is placed 3 cm from the bottom raw edge.
17. finish the seams of.
The placket/ front
The bottom
You can finish by overlocking or sewing a zig-zag
18. Place the two skirt pieces, with right sides together and sew the center back seam. Press the seam open.
SEW THE WAISTBAND
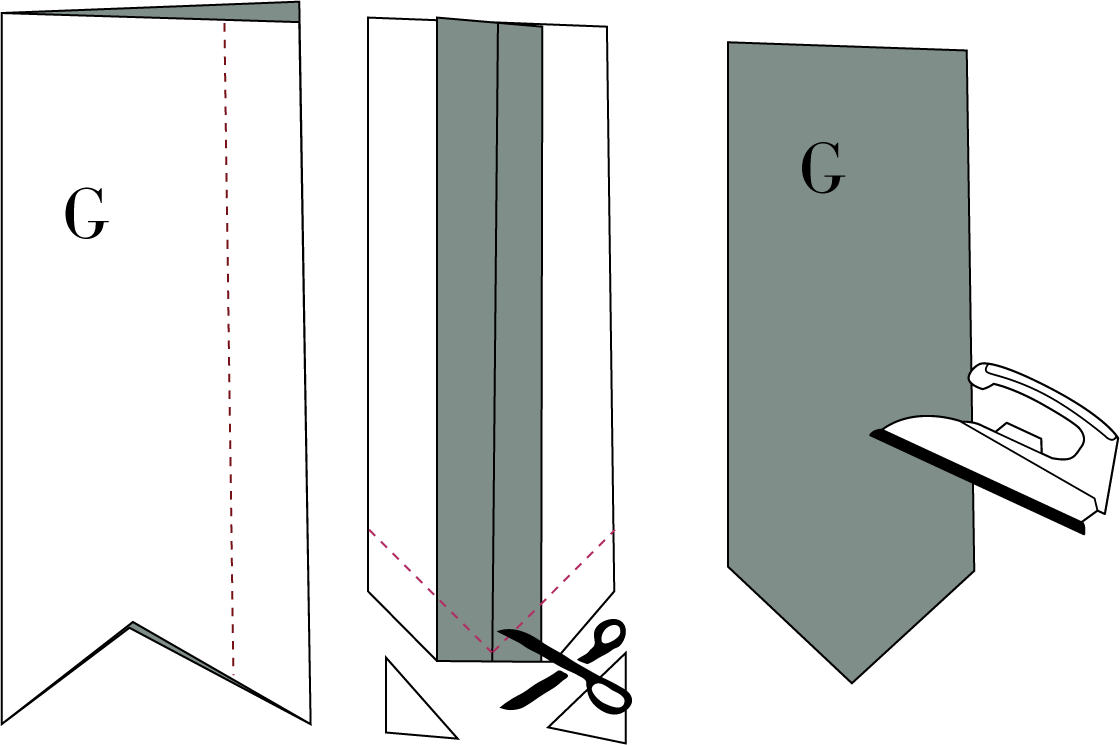
19. Fold a belt loop, with right sides together, on the long way, and sew together. Press the seam open and place the seam in the middle of the loop to create a point at the bottom.
20. Sew the point and cut corners.
21. Turn all loops and press nicely.
22. Sew one pair of waist band (E) together at the center back, right sides together. Press the seams open. Make two.
23. Place the four belt loops, with the seam facing the right side of one waistband (E) this way; one in each end 1 cm from the raw ends. the last two is placed according to the notches. Base stitch the four loops to the waist band 0,5 cm from the raw edge, to keep them in place.
24. Place the other waistband on top, right sides together. sew together on the short curved edge.
25. Clip notches to the seam allowance.
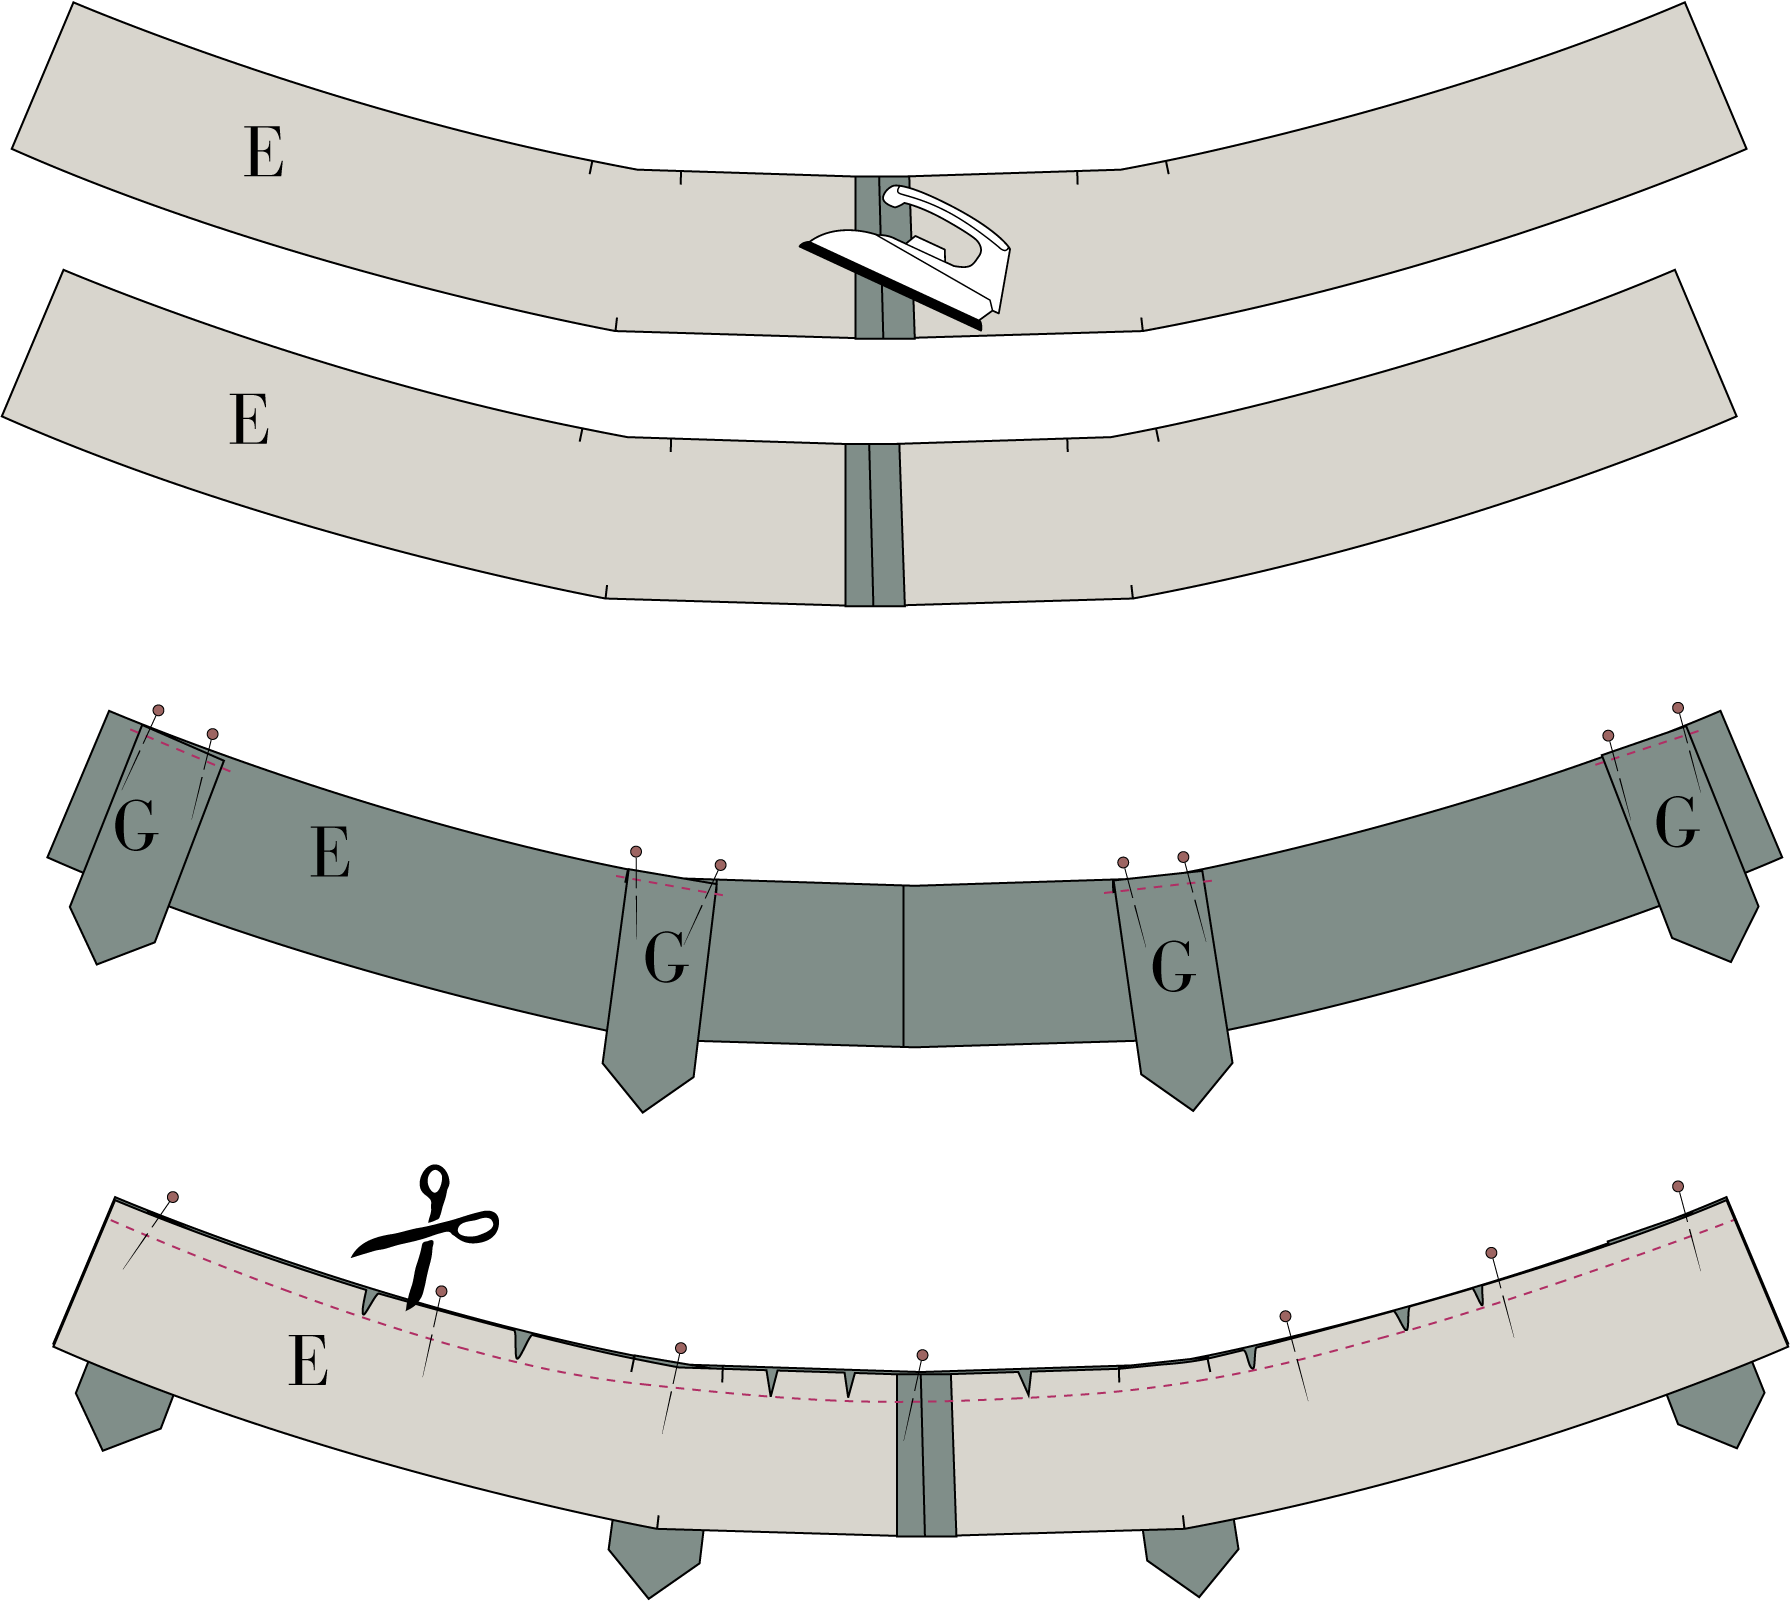
26. Press the waistband, with no belt loops attached, and all the seam allowance out from the waistband with the belt loops attached and Under stitch the waistband. The under stitched part of the waistband will be the one on the inside of the skirt.

27. Place the short side of the front waistband (D) to the short side of the waistband (E), right sides together. Sew the pieces together and press the seam towards the front (D)

28. Finish the raw edge of the waist band with the under stitch.
You can finish by overlocking or sewing a zig-zag stitch close to the edge or with a bias tape.

29. Place the waistband with the raw edge to the waist of the skirt, the ends of the waistband is 1 cm longer than the skirt.
30. Sew the waistband to the skirt and press the seam allowance towards the waistband.

31. Fold the waistband, right sides together, the seam allowance from point 30 should still lay towards the waistband, the the inside waistband will be 1 cm longer, pin together
32. Sew the ends of the waistband.

33. Turn the waistband, press and pin the backside of the waistband to the skirt. The finished edge, is visible from the backside.
34. From the right side stitch the waistband to the skirt by stitching in the ditch.

HEM THE SKIRT
35. Fold the placket to the front side of the skirt.
36. Fold the hem to the right side so the placket is lying sandwiched between the front skirt and the hem. Sew the hem to the front placket with a 1cm seam allowance.
37. Turn and press the hemline with 3 cm and make a topstitch 2.5 cm from the hemline. Alternatively, you can hem with catch stitch.

38. Make button holes on the right placket. follow the markings on the pattern.
39. Sew buttons to the left side of the placket.
40. Sew the belt loops to the skirt and add a button on the top for extra finish.
