

You Will Need:
Fabric width 110 cm
EU 32-40 4 m
EU 42-54 5 m
Fabric width 140 cm
EU 32-40 2.7 m
EU 42-54 3.3 m
Lining 25 cm.
Thread.
1 zipper 40 cm.
Small piece of interfacing.
No. 5 Århus - Version 1
Dress with a cap sleeve, bust pleat placed in the center front seam and a shawl collar.
Fabric choice:
Light to medium weight woven fabric. Cotton, Silk, Wool, Viscose, Cupro, Linen or Polyester The final look of the garment will depend on the type of fabric you choose. Not suitable for jersey.
Find Your Size:
Take your measurement according to the measurement chart. Choose the size closest to your measurement print measurement chart here

Fitting:
We recommend that you always make a muslin before you cut the fashion fabric, to make sure your finished style will fit you perfectly. Find the fitting guide right here.
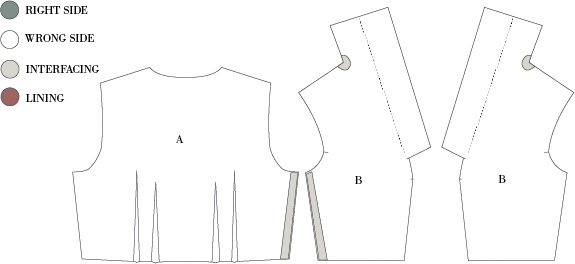
Cutting Fabric
Each pattern piece is marked with a capital letter. On the cutting layout plan, you’ll find the same capital letters so that you can easily see which pattern pieces to use for the view you’ve chosen.


Sewing
NB! The Pattern Has 1 Cm Seam Allowances Included, Unless Otherwise Noted.
Cut all your pieces in fabric as needed.
2. Cut two pieces of interfacing with measurements of 3 cm x 30 cm and two scraps approx. 2 cm in diameter.
3. Fuse the long pieces of interfacing to the wrong side of the fabric at the left side seam of the front (B) and back (A) pieces. This will make it easier to sew in the zipper later on.
4. Fuse the small pieces of interfacing in the corners of the collar on the front piece (B)
5. Finish the seams of:
You can finish by overlocking or sewing a zig-zag stitch close to the edge
The long seams of the skirt (D+E)
Side seams of the front (B) and the back (A)
Center front seam (B)

SEW THE SKIRT
6. Sew the front and back skirt sections the following way: With right sides together, sew one of the side skirt (D) to CF/CB skirt (E). Match the notches so you pair the right sides together. Repeat on the other side of CF/CB skirt (E) so you have a full front skirt. Do the same for the back skirt.

7. Sew the front and back skirt pieces together along one side seam.
8. For the other side, sew 30 cm up starting from the bottom, right sides together. This will be the left side seam.
9. Press all seams open.
SEW THE BODICE
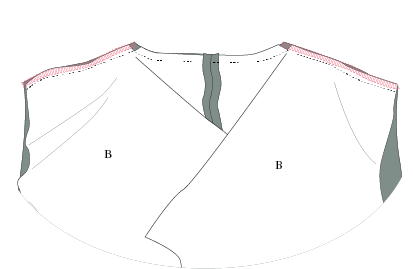
10. Sew the darts on the back piece (A) right sides together. Fold according to the notches and markings. There are 4 darts in total. Press towards center back.

11. To make it easier to get a nice finish when sewing, transfer the markings from the pattern onto the neckline of the back (A) and front (B) pieces.

12. Sew the two front pieces (B) together at the neck, right sides together. Press seams open.

13. Pin front (B) and back (A) together at the neckline, right sides together. Match the markings and sew from point to point, this is the neck neck seam. Remember to back stitch at each end.

14. Clip a notch at the neck corners on the front (B) cutting almost to the seam. Do not cut the back piece (A).

15. Turn the front shoulders and pin it to the backpiece, right sides together. Sew the shoulder seam.
16. Finish the shoulder seams by overlocking all layers together. Press the seams backwards.
17. Fold the pleats on the front piece (B). Start by matching the two notches with wrong sides together. Then, on the front, fold the pleat downwards and secure it with two pins. Do this on both left and right pieces. See video

18. Place the two front pieces with right sides together and pin them so the pleats match up perfectly.
19. Sew the center front seam stopping at the marking.

20. Fold the collar stand into the neckline and attach it to the neck seam. The collar is only attached at the neck, not at the front.

21. Sew the right side seam, right sides together. Press seam open.
ASSEMBLE THE DRESS
22. Sew the bodice to the skirt matching the side seam at the waist.
23. Finish the seam with an overlock stitch and press the seam downwards towards the skirt.

SEW IN THE INVISIBLE ZIPPER
24. Place the right side of the zipper along the edge of the side seam. Place the first teeth of the zipper 4 cm from the armscye.
25. Baste stitch the zipper to the dress. Remember to check that the waist seam is matching up.
26. Flip the teeth of the zipper aside and sew the zipper in place close to the teeth.

27. Sew the side seam together both above and below the zipper, so the side seam is finished.

28. Press the seam open and press gently on the zipper.
SEW THE SLEEVES
29. Place the lining on top of the fabric sleeve (C), right sides together. Sew the bottom edge.
30. Clip notches in the seam allowance. Press seam allowance towards the lining and understitch the lining.

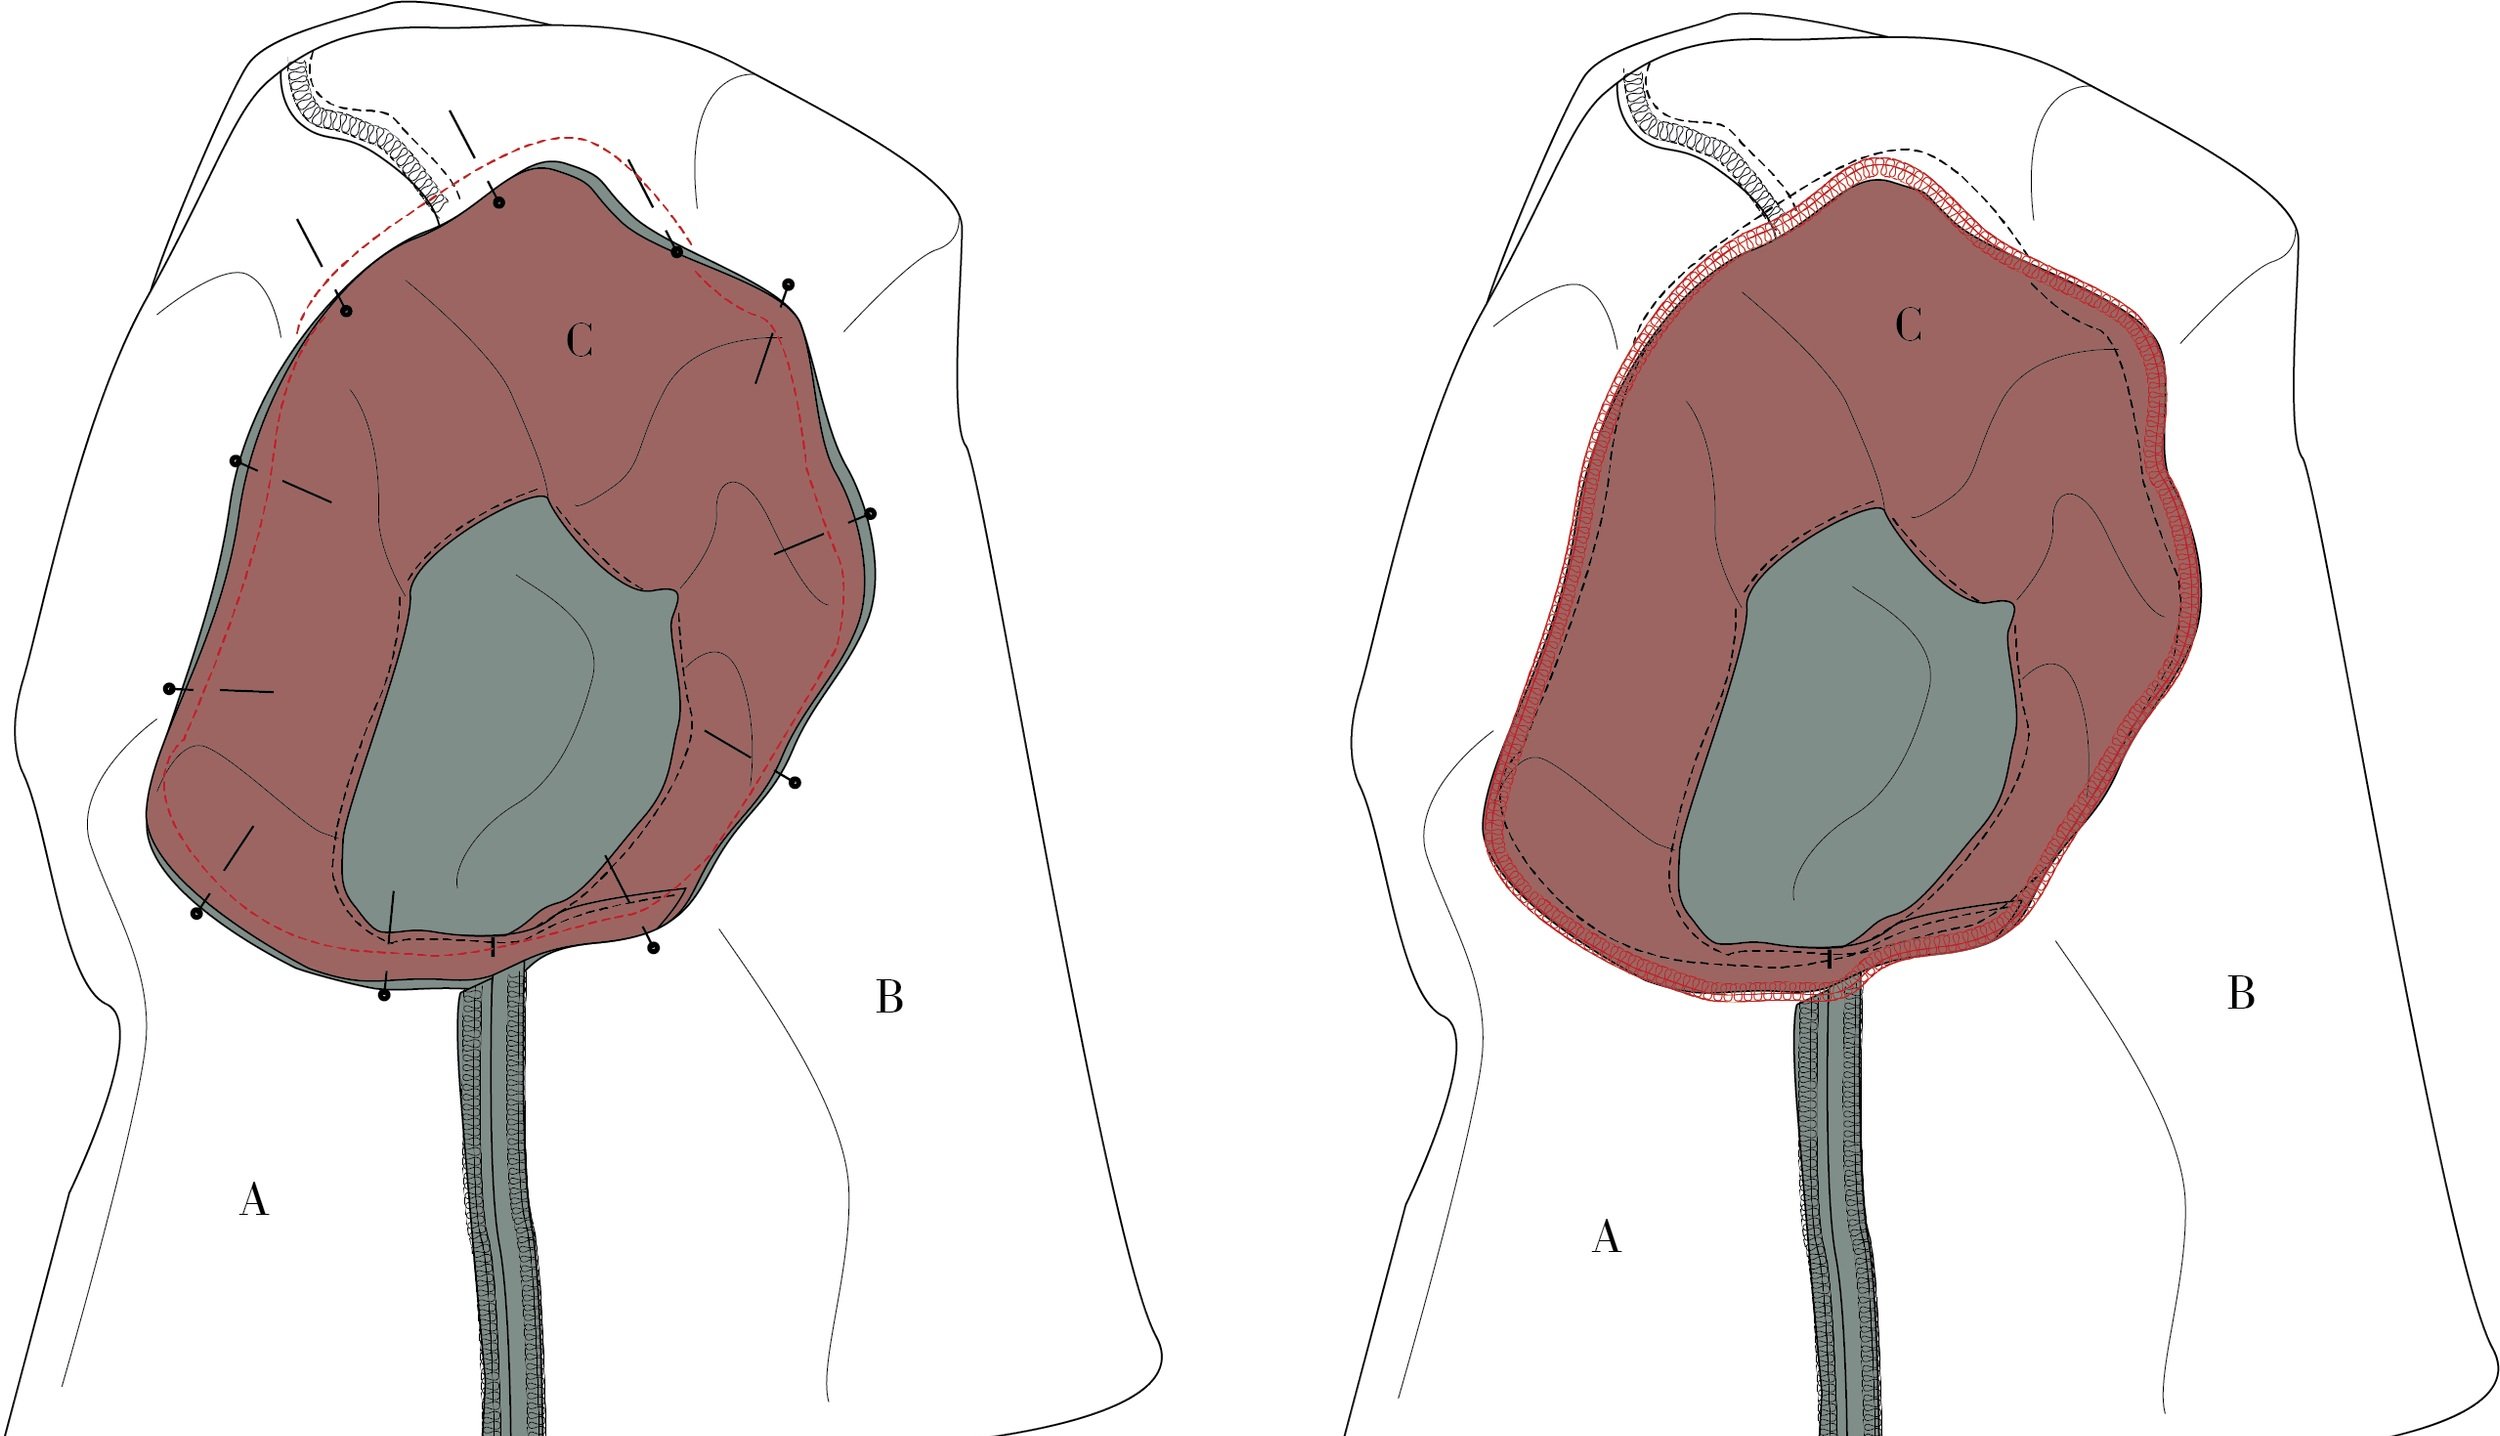
31. Assemble the sleeve by matching up the two side seam notches; sleeve ends overlap.
32. Sew the sleeves to the armscye – match the notches on the sleeve (C) to the notches in the armscye.
Tip: You can Sew an ease stitch 0.5 cm and 1.5 cm around the sleeve head if you find it difficult to make the pattern fit. The sleeve has a bit of positive ease.
33. Finish the sleeve seam with an overlock stitch and press the seam towards the sleeve.
HEM THE DRESS
34. Hem the dress with a narrow hem. Fold 0.5 cm then 0.5 cm
